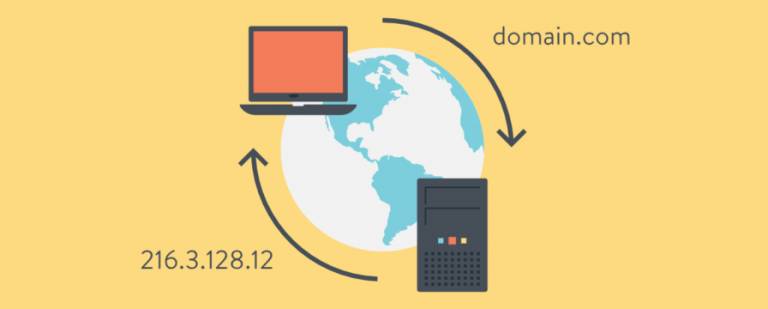
DNS (Domain Name System) is the yellowpages book for the internet world. Whatever you open it goes through the DNS. On the internet, every website or web page works on a specific IP address and DNS makes request to the entered domains and receives response from the specific website server and translates IP address back to domains name and returns the requested response to the user.
As a user types a domain in the internet web browser, DNS serves as an intermediary layer and matches the domain to it’s IP address from the internet pool of IPs, processes the request and respond back to user. This DNS working process can’t be seen through the end users.
Sometimes you might face the error of DNS not responding when you try to open up a webpage. This caused by some technical network problems which can be fixed easily. So, in this article I will show how you can flush DNS Windows 10 to resolve DNS error.
Over the internet, every machine uses an IP address to connect to the internet which is unique to that device only. Not anyone else can have that same IP around the world. In simple words, this IP works as you ID for the internet, and all the communications among devices are made over the IP address.
What is DNS and how it works?
ISP or Internet Service Providers installs the connection and configure all the default DNS settings to instant internet access. These DNS settings might be different for each of the ISPs. Once the ISP technical team setup DNS, this default DNS works best often without any problems. But sometimes users face an issue of DNS not resolving and couldn’t access the internet caused by incompatible DNS settings. So, to fix this problem, we can flush DNS in Windows 10 very easily as discussed in this step by step article.
What is DNS Flush and how to flush DNS Windows 10, 8, 7?
All the latest web browsers cache the IP address of DNS clients to provide enhanced user experience from that same host if visited again. Sometimes bad web pages are stored as DNS cache and this results the website unavailable to that device until we flush dns or clear dns cache. In order to get this problem fixed, we need to clear the dns cache, browser saved cookies and flush DNS windows 10.
Well flushing DNS in Windows 10 isn’t any hard. It’s very simple and straight forward to remove all cached DNS cookies etc. Once you flush DNS, it fixes all the DNS connectivity related issues automatically.
So, how to clear DNS cache or flush DNS in Windows 10?
There’s various ways to clear DNS cache and flush DNS in windows 10. Here in this article, I am sharing the two most used and working methods.
Method 1 – Windows Command
To clear DNS cache and flush DNS Windows 10 through Command Prompt, follow the mentioned step by step instructions.
- Goto Start menu and type cmd to open the windows Command Prompt.
- Make sure to run command prompt as administrator. To do so, right click on the Command Prompt in search results and select Run as Administrator.
- Type ipconfig /flushdns in the command prompt, and hit Enter.
- That’s all. Your cached results will be cleared.
If this method doesn’t work for you. Try the below mentioned alternate method.
Method 2 – Windows PowerShell
To clear DNS cache or flush DNS with Windows PowerShell, follow the below step by step instructions.
- Goto Start menu and type powershell to run the Windows Powershell.
- Select Windows PowerShell from propogated search results to run it.
- Type Clear-DnsClientCache once the interface is open and hit Enter to execute it.
- That’s all. Your cached results will be cleared.
How to resolve DNS server not responding Windows 10 issue?
This DNS server not responding windows 10 issue is caused by the mis-configured DNS server address which can be resolved easily by flushing DNS. For some cases, flushing might not work, so to resolve DNS server not responding issue, you can follow an alternate method to fix DNS server not responding issue. Follow all the below mentioned instructions.
- Press Windows + R buttons consecutively to open the Run box.
- Type control in the Run and hit Enter.
- Choose Network and Sharing Center from the Large categorized menu.
- Select Change adapter Settings and right click on LAN or Local Area Network or Ethernet or WiFi if connected through wired or wireless connection, select Properties.
- In this menu you will notice the IPv4 and IPv6 configurations. Select the IPv4 (Internet Protocol Version 4) TCP and click on Properties button.
- In this window, check the options Obtain an IP address automatically and Obtain DNS server address automatically and click on OK button to save the changes.
- Now select the IPv6 (Internet Protocol Version 6) and click on Properties button just like did in step 5.
- And again, check the options named as Obtain an IP address automatically and Obtain DNS server address automatically and click on OK button to save the changes.
- All DNS settings done. Just restart your system and DNS server not responding issue will be resolved.


